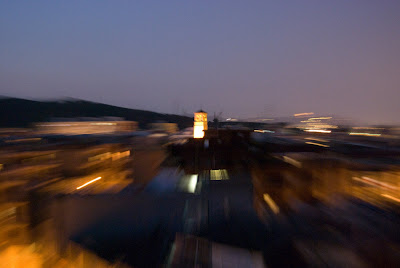
And on we go with the slow shutter speed effects series! We learned how to do panning, how to fake it on the pc, and now we're going to learn how to use the zooming technique.
This is a very simple technique but can achieve some neat results when applied correctly. It consists of zooming your lens in or out while the shutter is open. This creates a kind of tunnel effect towards the center achieving a sense of speed.
This is a very simple technique but can achieve some neat results when applied correctly. It consists of zooming your lens in or out while the shutter is open. This creates a kind of tunnel effect towards the center achieving a sense of speed.
Similarily to panning this technique requires the shutter speed to be the correct one. Slow enough to create the zooming blur, but fast enough to allow for a sharp image in the center. As always this speed will depend on your hands stability, focal length and whether you have image stabilisation enabled. I recommend you to use something between 1/10 and 1/60, take into consideration, that the faster you set the shutter speed, the faster you have to zoom in or out to make the image appear blurred in the corners.
If you have the time you can set a tripod and a slower shutter speed, say 1/2 por example and zoom in slowly, which will give you more stability.
If you have the time you can set a tripod and a slower shutter speed, say 1/2 por example and zoom in slowly, which will give you more stability.
Once you have set the correct shutter speed (Use shutter speed priority mode ) set your subject, or whatever part of the scene you want to be sharp, in the center of the image. Now click the shutter and zoom your lens in or out while it's open. This will blur the edges of the image, creating the zoom effect.
Also, you can combine the zooming in with panning to change the part of the image that remains sharp. For example, if you zoom in while pan the camera to the right, the sharp area will be on the right side of the image. Combining both effects however can be too difficult to the point that it becomes frustrating, so I would recommend you to reproduce the effect later on on photoshop if you want the sharp area not to be in the center. In my next post I'll show you how to do that easily, so stay tuned!
Also, you can combine the zooming in with panning to change the part of the image that remains sharp. For example, if you zoom in while pan the camera to the right, the sharp area will be on the right side of the image. Combining both effects however can be too difficult to the point that it becomes frustrating, so I would recommend you to reproduce the effect later on on photoshop if you want the sharp area not to be in the center. In my next post I'll show you how to do that easily, so stay tuned!


No comments:
Post a Comment