Tuesday, June 7, 2011

DSLR Simulator


Just a short entry, I just found this really cool DSLR simulator that lets you try every camera setting and watch the results. Why not give it a try and experiment a bit


Via: Twitter

Saturday, May 28, 2011

Active Noise Cancelling Technology and the Nokia BH-905i [Off-Topic]


It's been some time since I last updated the blog, since I rarely have time to. I wanted to write an article on active noise cancellation.

Last week Nokia sent me a BH-905i headset as a trial, thanks to WOMWorld and it got me thinking about Active Noice Cancellation (ANC from now on), so I thought I would share some insight on how ANC works and where you could find it more useful.

First of all which is the difference between active and passive noise cancellation?
Passive cancellation consists of isolating the ear or the sound source with any soundproofing material. You can find it in houses, cars, and even some computer cases. It works best with higher frequencies, i.e. higher pitch, is relatively cheap and consumes no energy.
However, passive cancellation doesn't work good with lower frequencies and often results in bulky devices, like isolating construction headsets.
Active cancellation was invented in 1934 and has been getting better ever since, but how does it work, and what is it good for?

ANC relies on the nature of sound. Sound is formed by waves, just like the ones in a water surface. If you have studied waves you probably have heard about destructive interference. Destructive interference is an effect which occurs when two opposite waves meet. Don't get me wrong, opposite doesn't mean that they are travelling in opposite directions, it means that one of them is on the crest and the other one on the trough, as shown in the picture by thescienclassroom


Both waves in the picture produce a sound by themselves, but add them in that exact point and they will cancel themselves out. This is basically what the BH-905i does.

Now, there are various ways to implement this and I don't know how it is done in this particular headset. You can take the simple analog approach, capture the sound, invert it and send it to a speaker, but it's not easy to generate the same wave (sound isn't going to be a pure sine wave like the picture above). Also you have the problem of doing it as fast as the sound propagation itself. Remember that the same wave, added in a different moment will not cancel the noise, but produce noise by itself. The microphones in a headset are like 1cm from the speaker which means you have to capture the sound, invert it and reproduce it in less than 30 microseconds, doable, but not easy.

Then there is the digital approach, which I think is the solution chosen for the BH-905i (I'm not an engineer at Nokia so I can't confirm this, I'd love to hear some insight from Nokia) this consists of digitally capturing the sound, decomposing it in different frequencies (through FFT) and then generating these same frequencies with opposite phase (which is the same as inverting the signal). Doing this allows the system to work with some delay and doesn't force the speakers to produce a very perfect sound. The result is that you get a really good attenuation for constant, low frequency noises. (Higher frequency noises mean shorter wavelengths, which means that crests and troughs are shorter and thus more difficult to put together) If you sit on an airplane for example, the engine is always generating the same soundwaves, since they're produced by components moving cyclically in the exact same way. This allows the digital system to capture the sound, analyze it and cancel it in a very efficient way.
The digital approach has a drawback, though. Processing the incoming noise takes time, so you can't cancel out random unpredictable noises like a conversation, steps or the wheels of a train against an uneven rail.
Summing up then, this headset, and others with similar working, is much more efficient at cancelling the noise of an annoying computer fan for example, than at cancelling conversations or similar noises.

I want to thank Nokia and WOMWorld for giving me the opportunity of trying this headset myself.

Friday, October 17, 2008

Creating Zoom effect on Photoshop


In my last article I gave you an introduction to the zoom effect on digital photography and showed you how to shoot it with your camera. This effect however is very difficult to master and can be recreated in photoshop with practically identical, or even better results. This is what we're going to learn today.

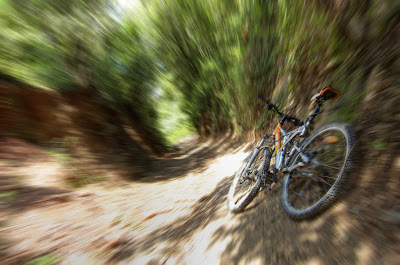
First of all choose a suitable picture. It can be anything with a subject you want to make stand out. I chose this picture of my bike standing aside a bike trail.

Now you only have to go to filters->blur->radial blur. Here you select the amount of blur, you have to select zoom and you have to select the center of the blur effect (this is the point you want to be in focus). Also I recommend setting the quality to optimal.


Now take a look at the image, if you're satisified with the result then that's it, if not you can try changing the amount and the center of the blur until you like the result.


Also there is a way of making your whole subject stay in focus. If you only follow the steps detailed above, you'll end up with only a small focused point. If you're subject is large however, it will probably be out of focus. But don't worry there is a very easy way to fix that. Select your subject and copy it to another layer, now apply the effect on the background layer and your subject will remain in perfect focus. To select the subject I recommend using quick mask mode (pressing Q) and then painting it all. Once you're done get out of quick mask mode (Q again) and invert the selecion. Now you only have to copy that selection to another layer and you'll have your subject isolated from the background.


Now when you apply the effect on the background, your subject won't be blurred since it's in a separated layer. This is what it will look like:


And that's how you fake zoom effect on photoshop! I hope you found this tutorial useful, also I let you another example here:


Thursday, October 2, 2008

Zooming technique


And on we go with the slow shutter speed effects series! We learned how to do panning, how to fake it on the pc, and now we're going to learn how to use the zooming technique.

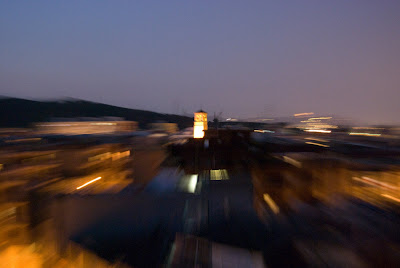
This is a very simple technique but can achieve some neat results when applied correctly. It consists of zooming your lens in or out while the shutter is open. This creates a kind of tunnel effect towards the center achieving a sense of speed.


Similarily to panning this technique requires the shutter speed to be the correct one. Slow enough to create the zooming blur, but fast enough to allow for a sharp image in the center. As always this speed will depend on your hands stability, focal length and whether you have image stabilisation enabled. I recommend you to use something between 1/10 and 1/60, take into consideration, that the faster you set the shutter speed, the faster you have to zoom in or out to make the image appear blurred in the corners.
If you have the time you can set a tripod and a slower shutter speed, say 1/2 por example and zoom in slowly, which will give you more stability.

Once you have set the correct shutter speed (Use shutter speed priority mode ) set your subject, or whatever part of the scene you want to be sharp, in the center of the image. Now click the shutter and zoom your lens in or out while it's open. This will blur the edges of the image, creating the zoom effect.

Also, you can combine the zooming in with panning to change the part of the image that remains sharp. For example, if you zoom in while pan the camera to the right, the sharp area will be on the right side of the image. Combining both effects however can be too difficult to the point that it becomes frustrating, so I would recommend you to reproduce the effect later on on photoshop if you want the sharp area not to be in the center. In my next post I'll show you how to do that easily, so stay tuned!


Tuesday, September 30, 2008

Faking panning on the pc


In the last post I showed you how you could use the panning technique to give your subject a sense of speed and make it stand out from the background. I hope I have given you enough time to experiment a bit with the effect before showing you the easy way: creating it in photoshop.

Let's take a look at how it works.

We'll take a picture where both the subject and the background are sharp, I've chosen this one:


With the scene so bright and the helicopter moving so, relatively, slow it was impossible to use a shutter speed slow enough to create motion blur. So I decided to recreate it on Photoshop.

Firs thing you want to do is select your subject. I recommend going to quick mask mode (pressing Q) and then "painting" your subject with the brush.

Once you're done click Q to get out of quick mask mode and invert the selection. It's a good idea to copy the helicopter to a new layer.
Now all you have to do is select the background layer and go to filters->blur->motion blur


Here you can select the direction and the amount of blur. The direction will have to be the same as the on of your subject and you can vary the amount if you want to make it more or less blurry , I used 30 pixels, but it will depend on your photo so try different values until you're satisfied.


And that's it now you can recreate the motion blur in your photos without having to use panning. My advice however is to try and make the panning effect straight out of the camera, it will look more realistic and most important it will be much more fun!

Tuesday, September 23, 2008

Panning


Some days ago we talked about how we could make our subject stand out using selective coloring. Today we're going to learn a technique that will make it stand out and give it a sense of speed. This technique is called Panning.

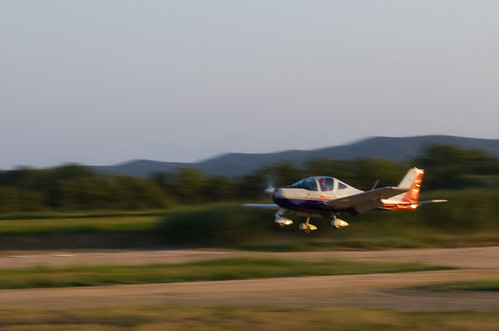
As you probably know when we shoot a moving subject with a slow shutter speed the subject will appear blurred on the picture. This is something you usually want to avoid, since you want your subject to be in sharp focus. The panning technique however, allows us to benefit from this effect by making the moving subject sharp and the background blurred. How does this technique work? This technique is very simple although it might require some practice. What you need to do is follow your subject with the camera, as long as the sutter is open. This will cause the subject to stay in the same position of the shot throughout the exposure, thus remaining sharp and will cause the background to have motion blur.

Only following the subject with your camera however won't cause the background to be blurred. First you have to make sure that there will be motion blur in your shot. To do that you have to set a slow shutter speed, I recommend using shutter speed priority mode. Setting the correct shutter speed is not easy, set it too low and you'll end up with an overall blurred shot because you won't be able to follow the subject precisely enough.


1/2--------------------------- 1/2

Set it too high and the whole image will be sharp, spoiling the speed effect.


1/495

I recommend using something from 1/6 to 1/60, but it will always depend on your subject's speed, proximity and your focal length.


1/60--------------------------------- 1/25

But setting the right shutter speed is not everything. You have to be able to follow the subject precisely, how do you do that? There is no perfect technique for that, you can use a tripod if the movement is completely horizontal, but I rarely have a tripod by me so I always do it handheld. What I recomemnd you is to start following the subject with your camera moving your whole upper body so that the movement is stable, when you feel you're moving at the same speed of your subject, click the shutter and keep moving with it until the shutter closes again, then stop moving. The most important thing of course is to keep the same speed as your subject while the shutter is open.

Cessna Pigeon

You can always use your flash together with the slow shutter speed to ensure you freeze your subject perfectly, but remember not to freeze the whole scene or the sense of movement will be spoiled. Also if you want to have more probablities of success use the burst mode of your camera and keep shooting as long as you can follow the subject.

And that's all I can teach you about panning, if you want to learn more go outside and practice, practice a lot, that's the only way to get this technique right!

PS: I'll write an article soon about how to fake this effect in photoshop, but don't rely on it, keep practicing, it's nicer and much more fun!

Photos by me and ttstam

Thursday, September 18, 2008

Understanding Histograms


If you've been using digital cameras for some time now, chances are you have already seen lots of histograms. They are shown by most cameras and imaging software and they are a very powerful tool to review your exposure. Today we are going to take a look at them and we're going to answer the question:

How do I interpret a Histogram?

A histogram is a graphical representation of a series of data, it's not only used in digital photography but also in many statistics representations. Every column in a histogram represents a case and its height represents how often this case is presented. Translated into digital photography, every column represents a tonal value, while its height represents how often this value is present in our picture.

The light values in a histogram go from 0, at the left meaning completely dark to 255, at the right meaning completely white.

This means, if a picture is dark the columns in the left will be higher, because a bigger part of the image will be contained in them.

It might sound complicated but let me show you some examples to make it easy.


This is the histogram of a normally exposed image. The tones are well distributed along the histogram from the darker to the lighter areas, there is a very high peak at the brightest end of the histogram showing the overexposed area caused by the light at the lower right corner of the image. These peaks are something to avoid, since parts of the image with so bright tones will end up just white without any appreciable detail. In this image though this is tolerable since the burned area is quite small. Also, we can see a wider peak in the bright area of the histogram caused, that shows the bright area on the wall that's being lit by the light.

What this histogram is telling us about the image is that it has a burned area, it has well distributed tones and an important area of the scene is brighter than normal.

Let's take a look at a completely different Histogram.


This image is was intentionally underexposed to give it a different mood, which is clearly visible in the histogram. If you look at its darker end, you will see how it contains a big part of the image. The brighter end is very low, filled only by some of the light rays and the clouds on the sky. Another important detail we can recognise in this histogram is that there are parts of the image in the very dark end of the histogram, as opposite to the image before, this shows that a part of the image will be shown black without any appreciable detail, once again this is something acceptable in this photograph because it creates the silhouette at the bottom of the picture. However you should try to avoid having values at the lower end of the histogram if you don't want any part of the image to be completely black.

So summing up, we have seen that a Histogram allows us to see how bright or how dark our image is, without having to rely on its brightness on the LCD screen, which can be affected by other factors like ambient light. It will also show us if we have burned or dodged any part of the image, so that we can notice if we have lost details in our picture, which is very difficult to see on the LCD screen only.

I hope this was a clear article, if you have any doubts or suggestions, don't forget you can let me know in a comment. Thanks!