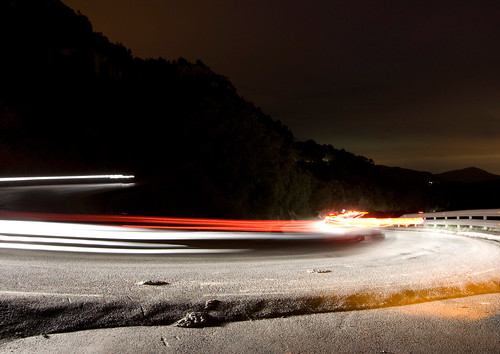
If you've read the "Mastering the basics" section you already know a lot about how to use the exposure settings creatively. In this article we're going to take a look at using long shutter speeds to get light trail pictures.
What you're going to need:
A tripod. When shooting at speeds longer than a second the use of a tripod is a must, trying to take these images handheld will result in very blurry images. You can however try to lay the camera on some stable surface but this limits your creative possibilities a lot.
A DSLR or Bridge Camera. Most point and shoot cameras don't allow for exposures longer than 1 or 2 seconds so we'll need to use a DSLR or bridge camera that lets us choose the shutter speed.
How is a ligh trail created?
The creating of light trails is very simple. When we let the shutter open for a long time any bright light that goes through the camera's field of view, will create a trail of light through the image. Used properly these trails can create very nice effects on roads and can be an interesting addition to a cityscape shot.
The first thing you have to do for getting a light trail shot is finding a place with moving lights, a typical location to start at is a driveway. Set your shutter speed to a value between 5 and 30 seconds, I recommend using the Shutter speed priority mode . Now mount your tripod and frame the shot. Once a car approaches, click the shutter button. The lights of the car will create a light trail on the image as long as the shutter is open. Review your results and try using different shutter speeds.
Using flash. Although flash is not often used in light trail shots it can create a nice effect showing the object that creates the trail and the trail itself. I recommend using rear curtain flash, in this mode the flash is shot just before closing the shutter and it makes the subjects lit by the flash appear at the end of the trail. Something like this:
Going back to the techincal aspects, i recommend using a low ISO and enabling noise reduction in your camera's menu to reduce digital noise from the long exposure.
An interesting addition to our gear if we want to shoot light trails often is a remote control. Triggering your camera from a remote has 2 advantages:
1. We won't need to touch any button on the camera, eliminating every chance of creating blur in the image.
2. It will allow us to use bulb mode, in this mode you'll be able to open the shutter with one click of the remote and closing it with a second click. This way you can't exactly control how and where the trail is created.
A very special kind of light trail are star trails, but we'll talk about that in the next article so stay tuned!

3 comments:
This is great info to know.
can i ask when will i half click the shutter and when will i click it fully to take the shot?
can i ask when will i half click the shutter and when will i click it fully to take the shot?
Post a Comment